Getting Started with Plutus Using KuberIDE
If you want to get started with Cardano blockchain to build decentralized applications, you must be familiar with Plutus. Plutus is the native smart contract language for Cardano blockchain. I will be taking you through an example on how to compile a Plutus contract to split values locked in a script between two fixed beneficiaries. We will be using KuberIDE to compile our contract and get the script address. We will also be using KuberIDE's transaction builder to pay and redeem from our script.
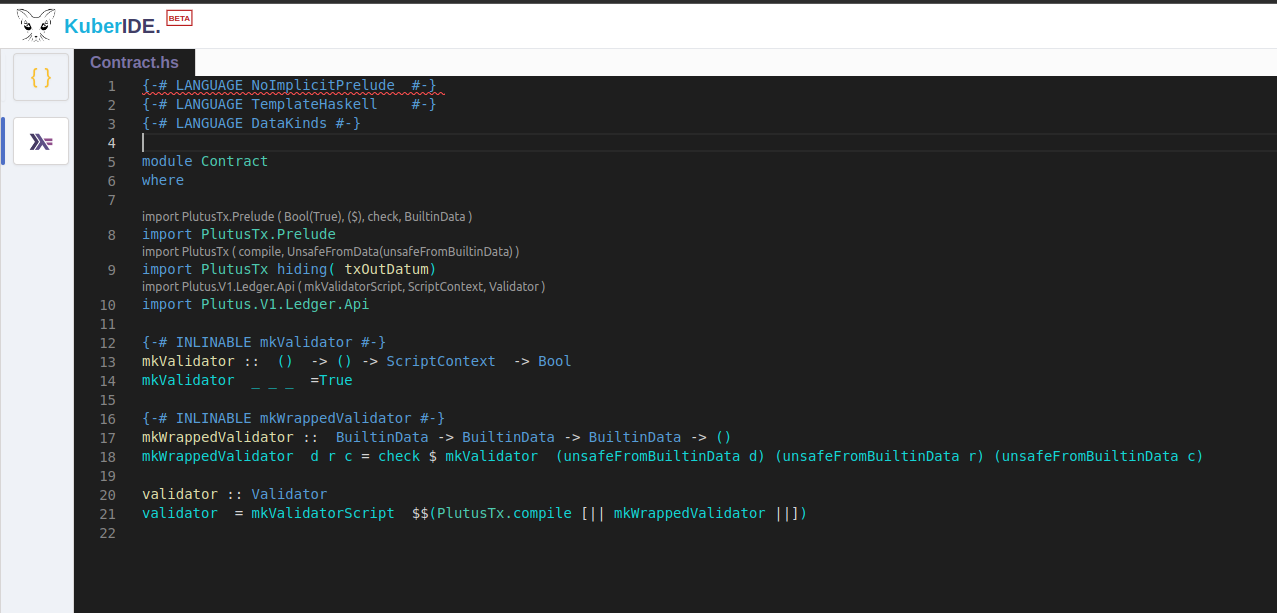
We will be prompted with the following code structure and some default imports once we load Kuber's Plutus compiler.
On the right side of the IDE, there are 5 tabs arranged vertically. Try tilting your head to the right to get better readability. One of them i recommend to try out is the examples tab.
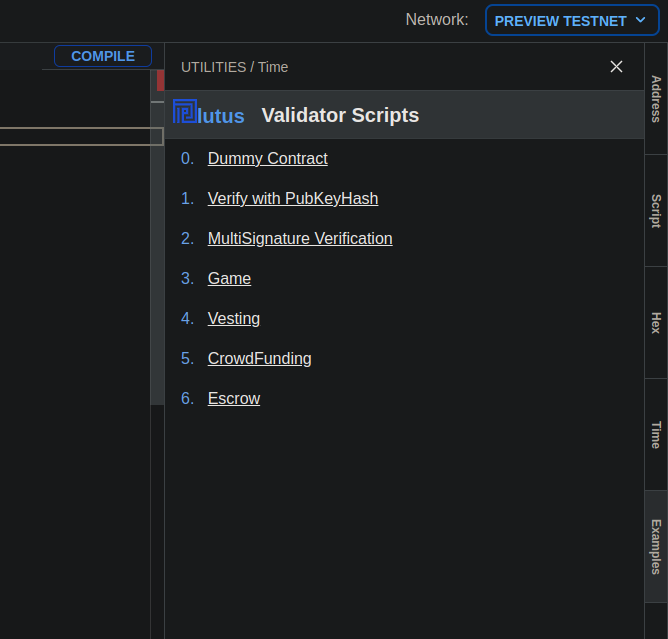
Try compiling these examples, and skim through them to get a better understanding of how to write a Plutus contract. On the top-right , you can select the Network to be either the Mainnet or some Testnet. I will be using the Preview Testnet to avoid going bankrupt on my real Cardano tokens in case I write a bad script. If you on the other hand are a risk taker, go ahead and select the Mainnet. Otherwise i suggest we stick to some Testnet.
The contract we will be compiling is a static one. We will write it so that it compiles correctly (obviously) to get a script hash. Then, we will be writing JSON to build the transaction to pay to the script and redeem from it.
Download the file (Split.hs) below. You can copy it's content to Kuber's Plutus compiler and click the Compile button. If you're one of those people who are hesitant to download files from the internet, scroll down to the end of this blog, click the link to my github repository where you can find the same file.
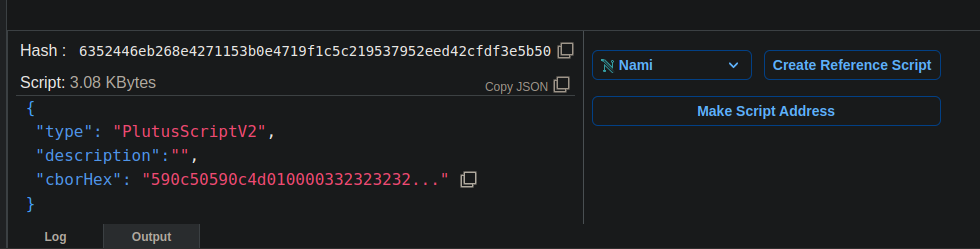
Once you hit Compile, you should be able to see something like this:
let's break this down.
- Hash: This is also called the script policy id. It is a unique identifier that is generated for a Plutus script. It is a hash of the Plutus script policy code and serves as a reference to that specific policy. The script policy ID is used in Cardano transactions to specify which policy the transaction adheres to. This ensures that the transaction is executed only if it meets the conditions set out in the corresponding script policy.
- Script: Let's understand this as the output we get from compiling our contract. This is the actual content from which the Hash was generated. The `type` attribute holds the type information of our Plutus contract i.e.
PlutusScriptV2. Thedescriptionis used to describe the script. ThecborHexis the serialized cborHex representation of the script. CBOR stands for Concise Binary Object Representation. CBOR serialization largely reduces the code size as compared to early binary serializations such as ASN.
On the right side of the output, you can select the wallet of your choice. The Create Reference Script has not been implemented yet. It is supposed to store the script hash on-chain. The Make Script Address button will generate an address from the script hash.
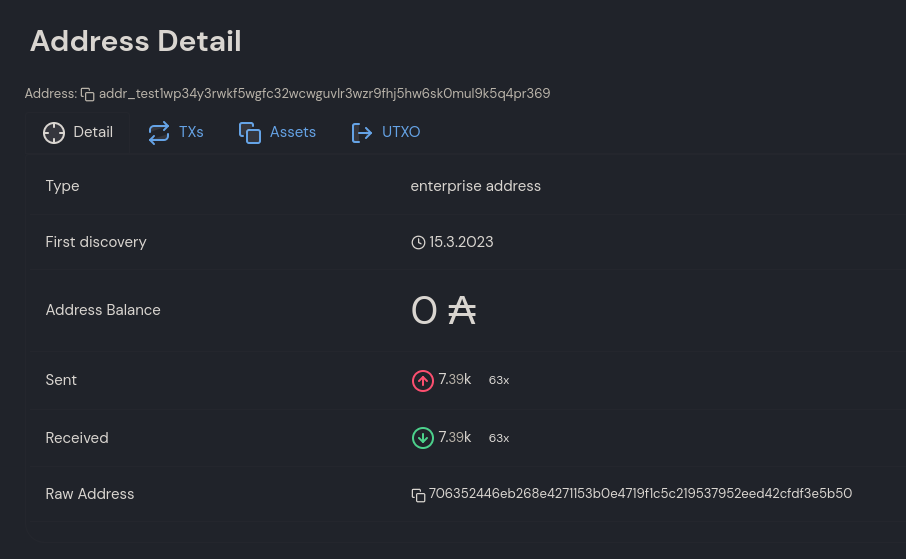
Make sure you select the correct Network. To see if the contract has been compiled and the address generated is actually valid, you can use the cardano CLI to check it's existence. An easier way is to check the address and the value it holds is to use some online blockchain explorer for the cardano network. I will be using Cexplorer (https://preview.cexplorer.io/) since i am compiling on the Preview Testnet.
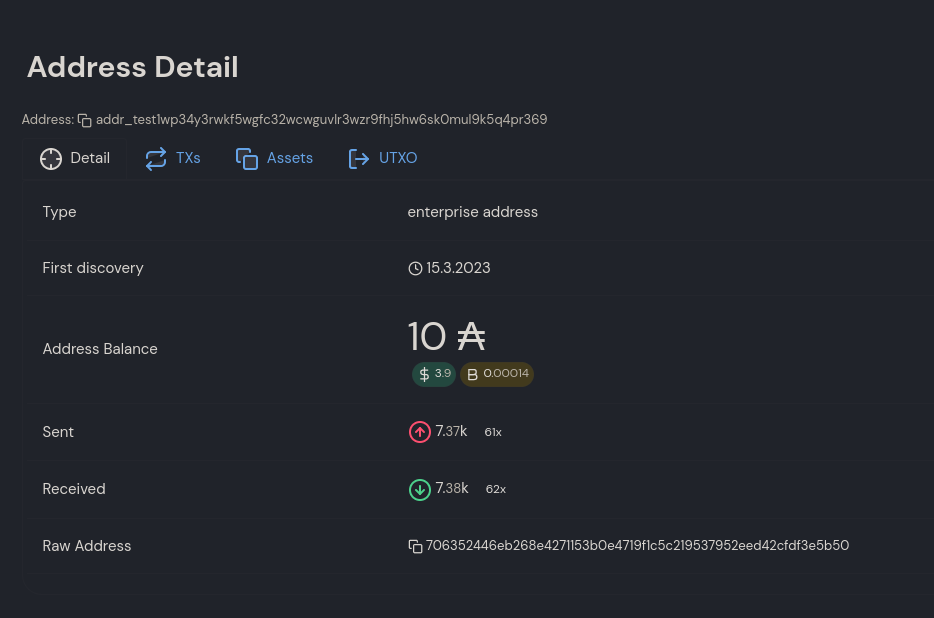
As you can witness from your sense of vision, the address is a valid Preview Testnet address and it has a value of 10₳. You might be wondering, what killed the dinosaurs? You might also be wondering how the script already has a value of 10 Ada. The answer to your first question might be "Asteroids", I'm not entirely sure. The answer to your second question is "Kuber's transaction builder".
The Transaction Builder is an amazing feature that allows us programmers to build cardano transactions in a familiar JSON format. We can write JSON to transfer funds, pay, redeem, create and mint NFTs etc.
Refer to the following link to understand the keywords and how to appropriately structure the JSON:
 dQuadrant
Now, I am going to assume you are familiar with the JSON Keys used in Kuber. Let's switch to the Transaction Builder to pay some Ada to our script.

Let's scan this from the top. First, select a wallet provider. The available cardano wallets installed as your browser's extension will be available. If you want to manually add selections in your transaction JSON, you can deselect the checkbox Add Wallet UTxOs in $.selections. But I would be very disappointed if you did that. The selections will be added automatically from your wallet if you keep the checkbox checked.
Let's look at the JSON to pay to the script:
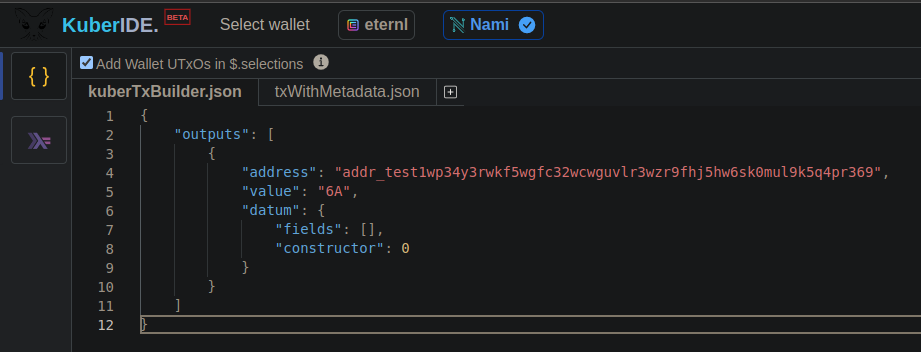
The address key holds a string value of the address of the script we compiled. It is the address to which we want to pay some value to. The value key holds either an integer or a string value. An integer value represents an amount in lovelace that is to be paid to the address. A string value like "6A" or "6ada" suggests that you are building a transaction to send 6₳ to the specified address. The datum object is an empty inline datum in this case. You can try using the address of a friend's wallet and send some test Ada to check if it works. In case you have no friends, just use the script address and hit the compile button on the top-right.
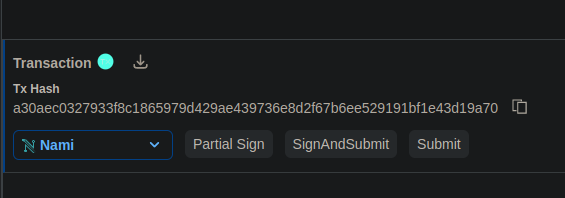
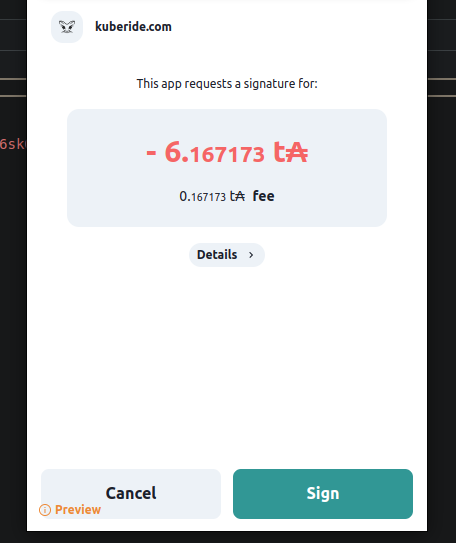
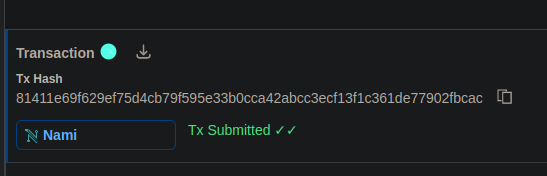
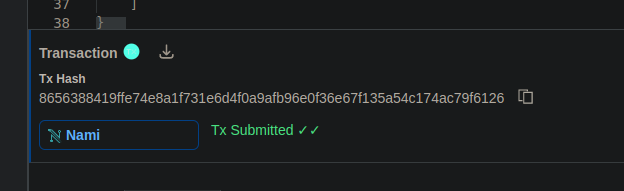
If your JSON was in the correct format, your transaction will be compiled and ready to be signed and submitted. The TxHash is the hash of the transaction we built using Kuber. We can use it to track the progress and status of the transaction in the cardano blockchain. Select your wallet from the drop-down. The Partial Sign button is used to sign the transaction with your wallet's private key. You will be asked by your wallet to sign the transaction. Think of it as the process of signing a check but not yet cashing it in. To cash in the check, click on the SignAndSubmit button. If you hate that button for some reason, make sure that the transaction is signed and hit the Submit button instead.
After the transaction has been signed and submitted, Kuber will tell you that the transaction has been submitted. It will also show you the submitted transaction's hash.
Okay. Now what? How do you see where you sent 6 Ada to? Where did it go? Too many questions? Let's look at Cexplorer again. Let's see how valuable our script is.

Our script is now 6 Ada more valuable than it was before. This is how you pay using Kuber's transaction builder.
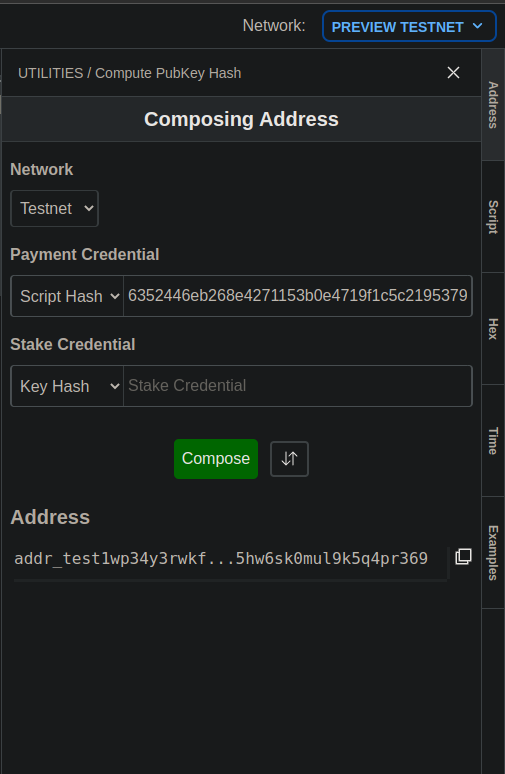
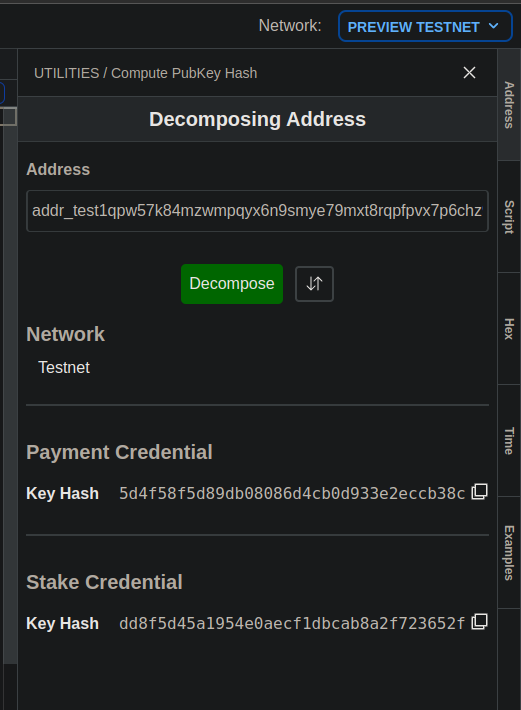
Now let's try to Redeem from our script. I have written it so that the value is equally split between only two beneficiaries. If you want to change who the beneficiaries will be, you will have to change the Plutus Contract's validator function. Replace the PaymentPubKeyHash with some of your friends'. And again, if you have no friends, just use the ones I used. You can get the PaymentPubKeyHash from Kuber's Address tab located on the right. Enter the Address and click on the Decompose button. Replace the currently existing PaymentPubKeyHash with the one generated from Paymment Credential.
If you made changes, compile it again and pay some amount to your very own script.
Now, let's build the transaction to redeem from our script. The transaction will only work if the output addresses are the ones with their payment pub key hash in the compiled script. Also, make sure that the values assigned to the outputs are equal and that their sum equals the total value of the script. Take a look at how i wrote mine:
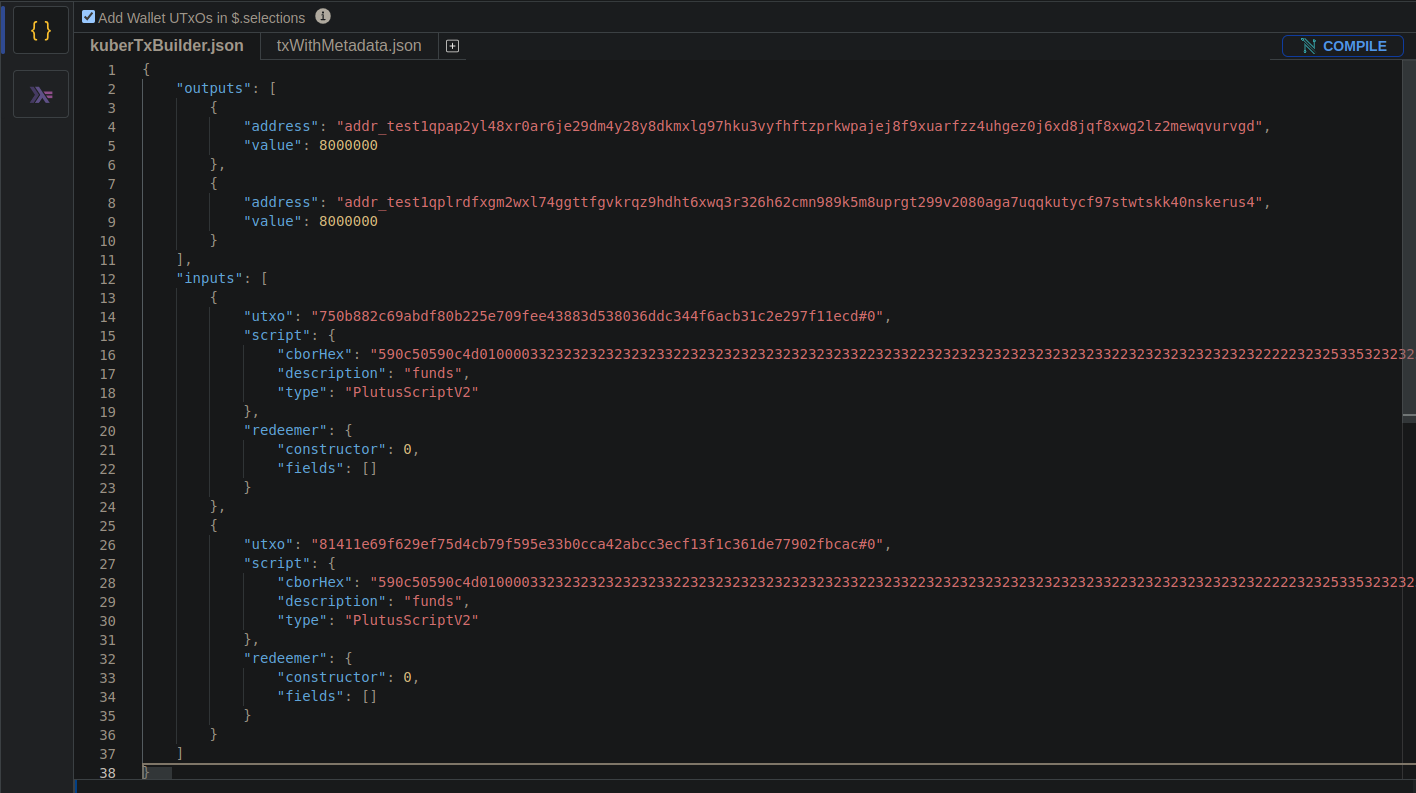
Since my script has a value of 16₳, i have divided the values into 8000000 Lovelace each. The inputs section has the following keys:
- Utxo: This is the UTxO id with it's index written after the '#' sign. You can get the UTxO id after each payment submission from Kuber. It is the
Tx Hashyou see when the transaction is submitted. - Script: You can copy and paste the script generated after compiling the contract in the plutus compiler. It is needed to identify the utxos belonging to out script.
- Redeemer: An empty redeemer is needed just like an empty datum we used in the output while paying.
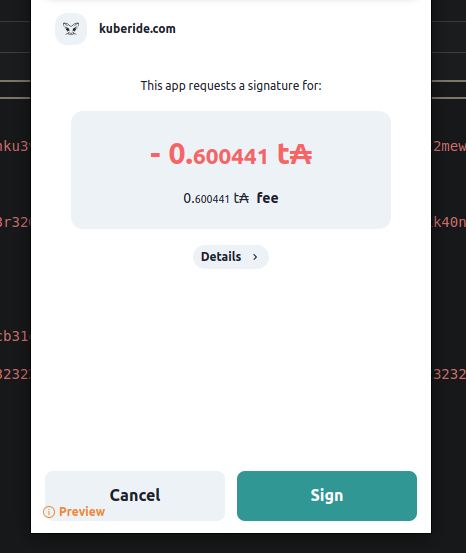
The script had 2 payments made to it, so i am using two fields in the inputs section. You can always make more payments and write more inputs. Now, let's compile it and sign and submit the transaction just like we did earlier. You will have to pay some transaction fee even though you're not getting paid. It's not fair, i understand.
Now let's look at Cexplorer again to see how much value our script holds.
Zero, None, Valueless just like my investments on NFTs. But how can we verify that the right beneficiaries received the 8₳? Let's try to look up the Tx Hash we get after submitting the redeeming transaction in Cexplorer.
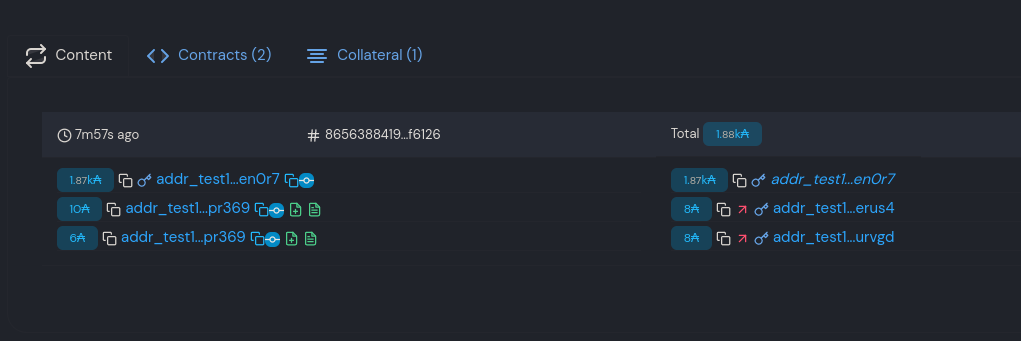
You can verify if the addresses that the 8₳ got sent to are the ones you used in the script and the JSON. In the image above, we can see that the inputs to the script are 10₳ and 6₳ from the address ending in "pr369". And on the right side, you can see that 8₳ each got sent to two different addresses that were assigned in the transaction.
This is it. I hope you followed along with me and everything worked fine. if it didn't, it's your fault and not mine. Please try writing your own contracts, compiling them, and building transactions using Kuber. It is simple, but it can also be sophisticated when needed.
Thank you!
reeshavacharya